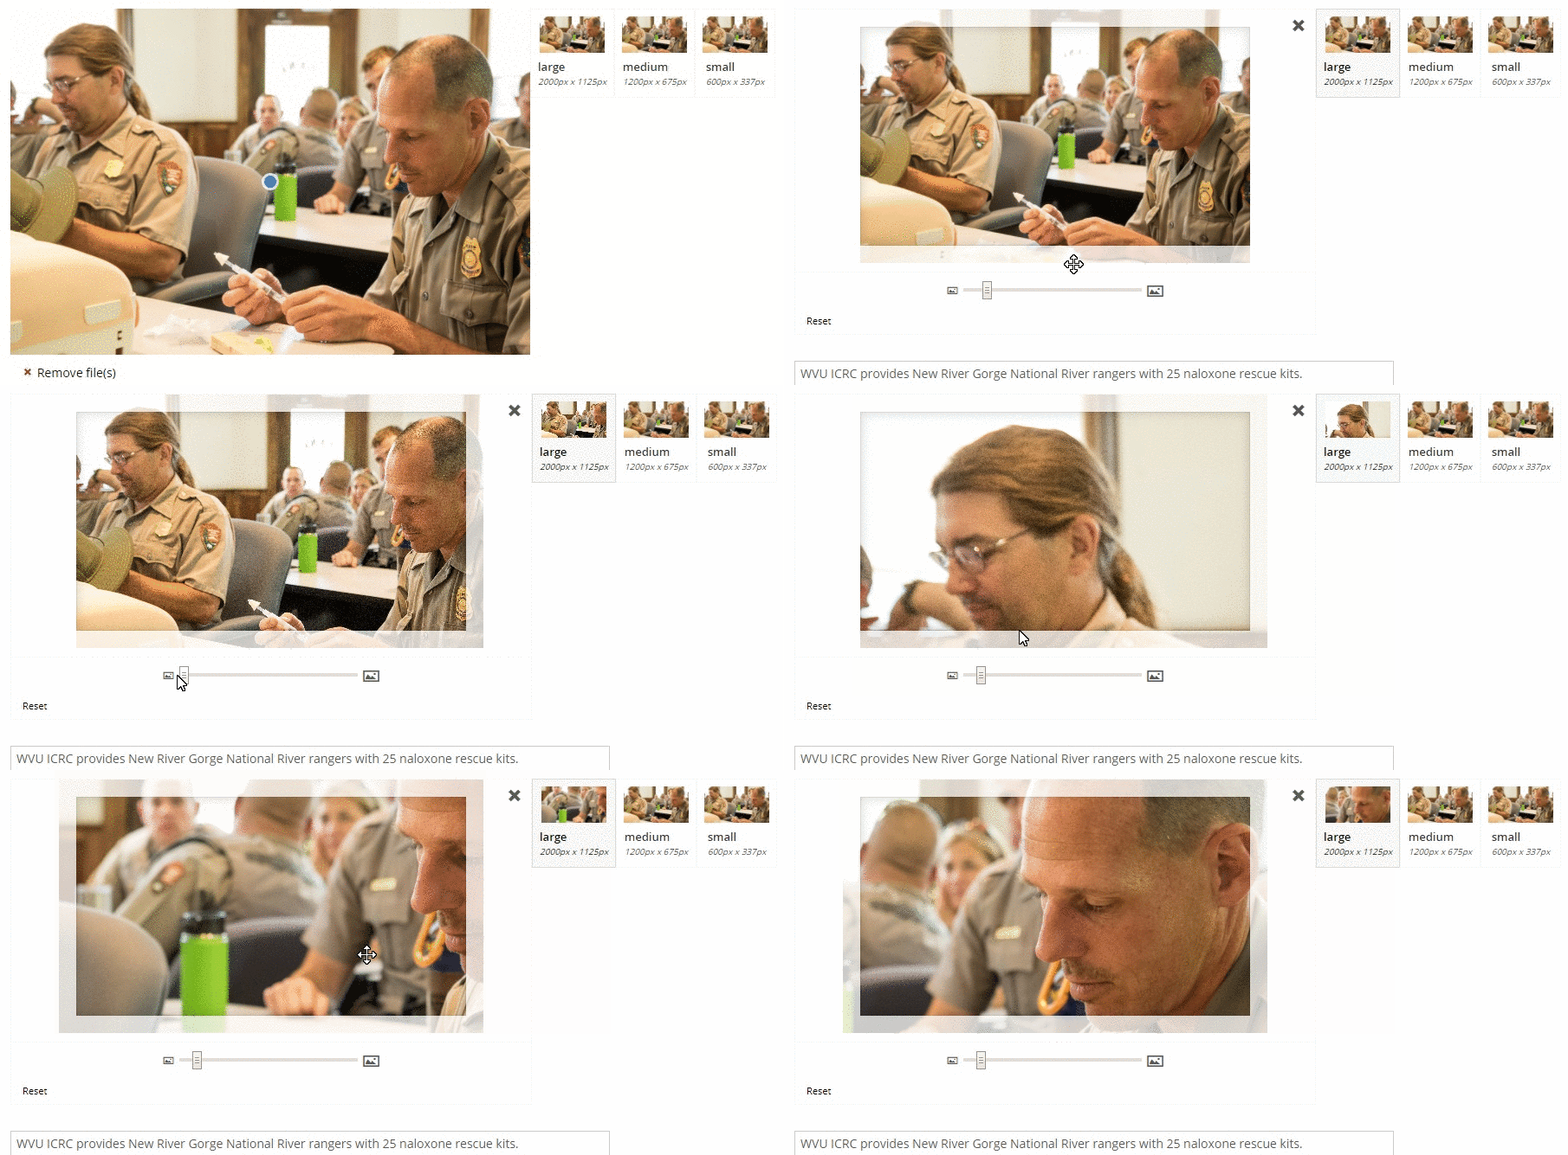
Image Cropper Tool
The Image Cropper Tool is used in the Feature area and on other pages, such as Profile pages. It takes the image you've uploaded, scales it to an appropriate proportion (see the Brand Center photography guidelines), and creates multiple sizes for better mobile use/image compression. Once an image is selected, you will then have full control of how your image displays at various sizes using zoom, positioning, and focus adjustments.
Using the Image Cropper #
Uploading Your Image #
- In the "Feature Image" area, click
 Click to Upload.
 - An “Open” dialog box should appear allowing you to browse your computer for the image you wish to use. The image will then be uploaded to the website. Note: Please reference our Naming Conventions before uploading your file.
- Be sure to include appropriate Alternative Text.
- One large box and a few smaller boxes will appear with your image in them. Those boxes represent the sizes your image is automatically cropped to for multi-device use.
Adjusting Your Image Crops #
Image Focus #
When using the image cropping tool, begin by dragging the  green dot to the spot in the photo that should be the default focal point for all of the crops of the image.

Image Zoom #
If the individual image crops need further adjustments after the focal point is set, you can click on each crop and do a combination of:
- Adjusting the slider to zoom in or out on the crop.

- Dragging the image to change the framing of the crop.
Please note: A reset button appears once an individual crop is selected and has been adjusted. This reset button will set the crop back to using the initial focal point and zoom level.

Removing an Image #
To remove an Image, click ![]() Remove File(s). Note: there is no undo. Once you delete the image, you will lose all your crops and manually set image focuses.
Remove File(s). Note: there is no undo. Once you delete the image, you will lose all your crops and manually set image focuses.